The Brick Box
Meet Shree and Ryan from Edmonton in Alberta, Canada, who purchased a 1923 craftsman home in 2019, and started renovating it room by room in August 2020. Ryan is an apprentice cabinetmaker who knows his way around woodworking, while Shree is a marketer who is eager to help where she can. We first learned of Shree and Ryan's renovation adventures on Instagram (@thebrickbox).
Photography by Shree & Ryan (@thebrickbox on Instagram)
Q. What would you like our readers to know about this project?
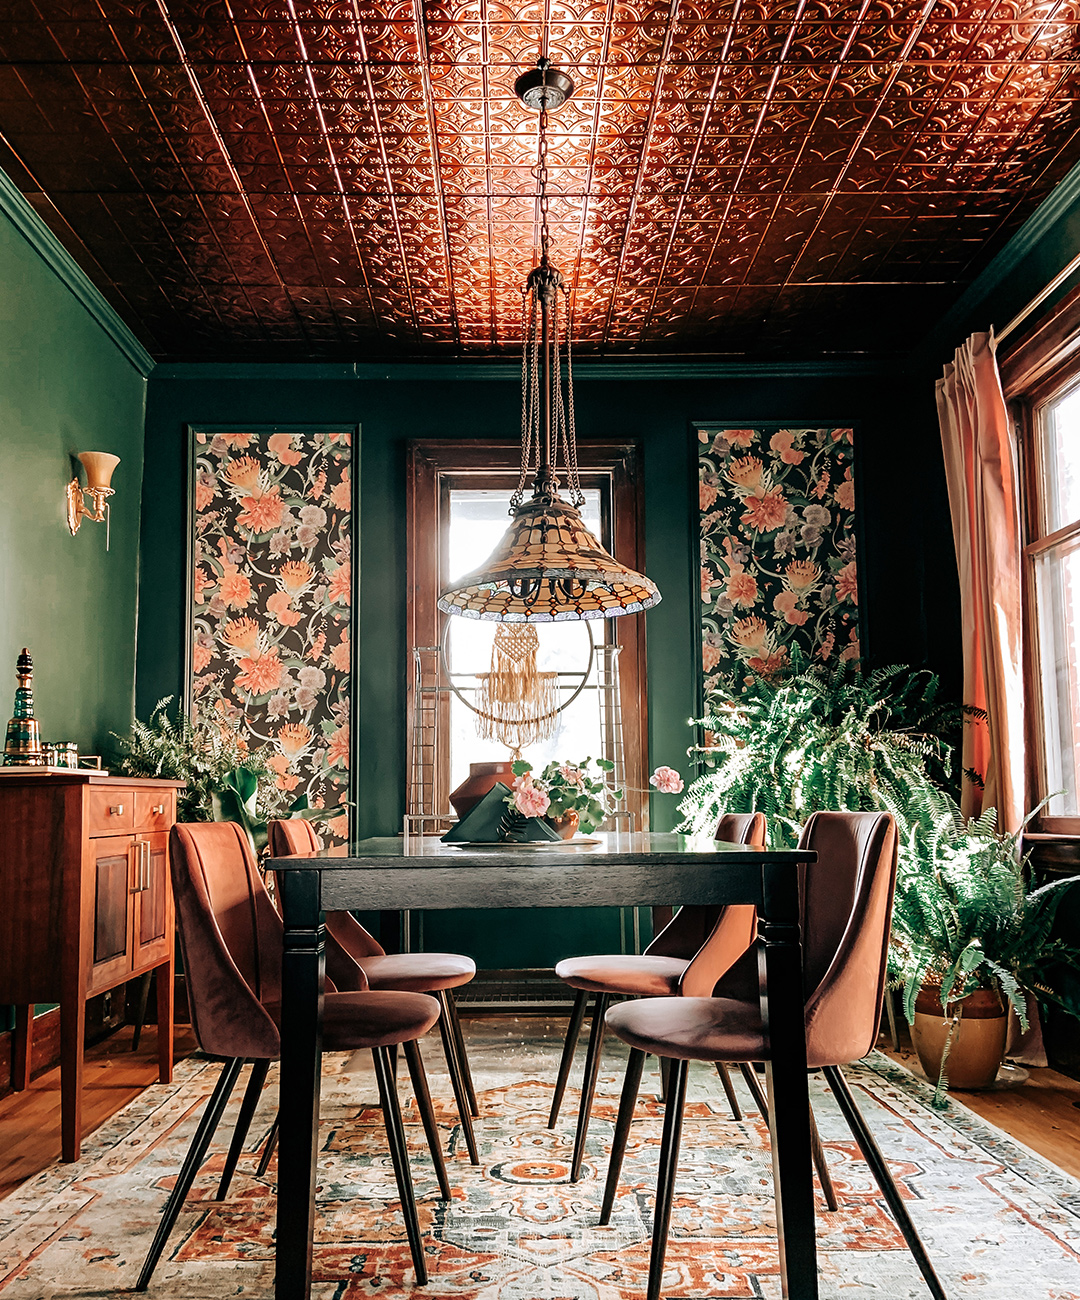
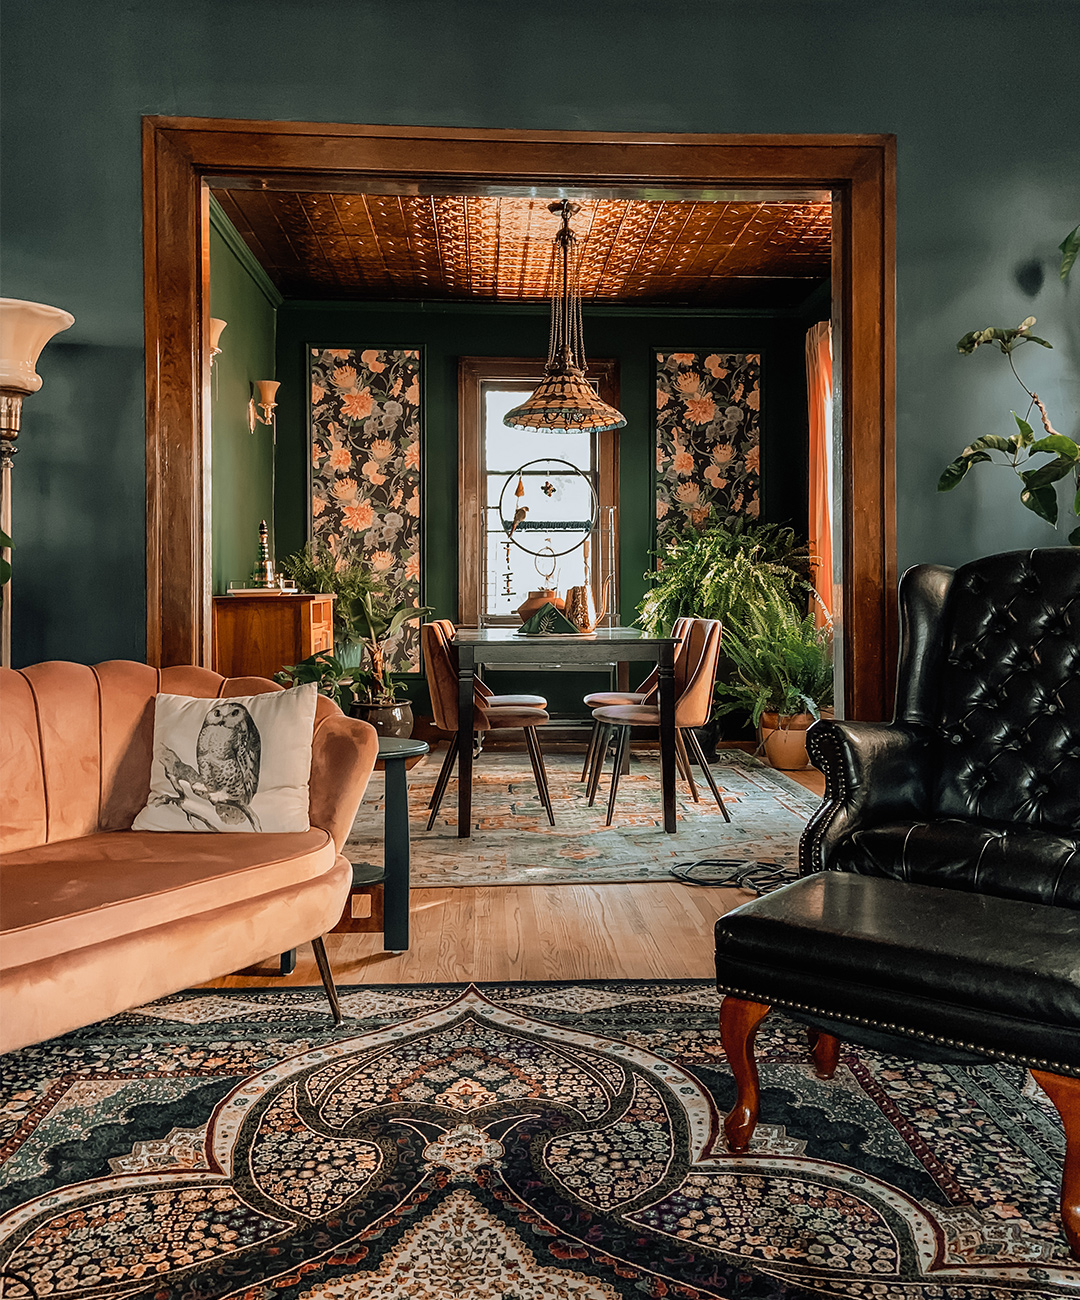
A. This featured project (living room & dining room), we did entirely ourselves in 7 weeks. We wanted to give these living spaces a classic touch that fit with the style of the house, but also wanted to add unexpected décor to balance out the traditional feel.
Both rooms had plaster walls and ceilings that showed signs of cracking. Our aim was to repair the cracks in the plaster, paint the ceiling white and add crown molding. However, after one day of removing wallpaper, we did not want to take on the ceiling project. Instead, we found American Tin Ceilings and fell in love with the tin ceiling tiles.
Q. What can you tell us about this project (project scope, location, square footage, etc)?
A. Cost: $1,200 CAD cost of ceiling tiles, furring strips, shims, nails
Location: Dining room in Edmonton, Alberta, Canada
Square Footage: 143 sq. ft. (11' x 13' room)
Ceiling Project Scope:
- Remove wallpaper from the ceiling and find the joists.
- Screw in furring strips every 12 along the joists and level them using wedges/shims.
- Apply a chalk line to find the ceiling's true center and nail up the ceiling tiles down the middle of the room, and then out to the sides.
- Apply chalk lines to measure out the squares where each tile would go.
- Use a Brad Nailer to secure the tiles to the furring strips.
- Use tin snips to cut out the light fixture hole and to cut down the edge pieces.
The installation took us 2 days one day for the field tiles and another for the edges.
Q. How would you describe the design style of this project?
A. A bold and dramatic take on traditional craftsman style.
Q. How did a tin ceiling support the design style?
A. Since we were going for a dramatic yet warm style, the tin ceiling provided the color palette we needed. We have lots of natural light in the room, but not as much in the evenings. Regardless of the time of day, we love how the tin ceiling casts light back down into the room it offers brightness and a warm style.
Q. Why did you choose Pattern #3 in Rustic Copper Translucent?
A. We chose Rustic Copper Translucent because we felt it would be dramatic without overwhelming the other design elements in the room. We also debated Metallic Gold but thought the yellow of the gold wouldn't work as well with the warm tones of the wood in the room.
Q. What led you to purchase tin panels from American Tin Ceilings?
A. We were in awe of the effect a tin ceiling would have on guests in our home. When we walked into what would be our house for the first time, we said Wow to each other at the potential, and the classic beauty of the home. We wanted to instill that same sense of wonder for everyone else that steps inside our home, for years to come!
Want to check out more about Shree & Ryan on Instagram?
Website